Adorable Amphibian Amigurumi: A Green Frog Crochet Pattern
Adorable Amphibian Amigurumi: A Green Frog Crochet Pattern
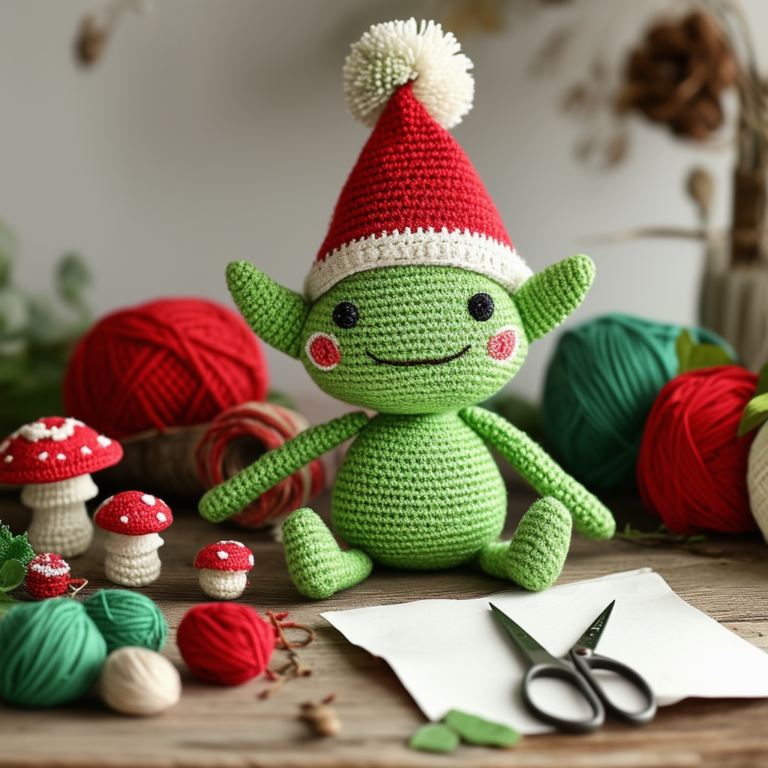
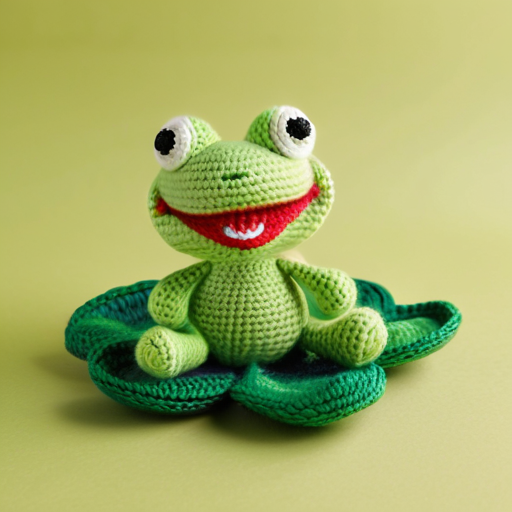
Creating charming amigurumi, those delightful crocheted stuffed toys, offers a rewarding creative outlet. This particular pattern guides you through the process of making a cute green frog, a project suitable for crocheters of intermediate skill level. Before beginning, gather your materials: worsted weight yarn in green, white, and black; a 3.5mm crochet hook; fiberfill stuffing; a tapestry needle; and safety eyes (approximately 6mm). Accurate gauge is not critical for this project, but maintaining consistent tension throughout will ensure a well-proportioned frog.
We’ll commence with the body. Using your green yarn, create a magic ring. Then, work six single crochet stitches into the ring. This forms the foundation of your frog’s body. In the next round, increase in each stitch, resulting in twelve stitches. Continue increasing in each stitch for the following two rounds, yielding twenty-four and then forty-eight stitches respectively. After this, work six rounds of single crochet without increases, maintaining the forty-eight stitches. This establishes the bulk of the frog’s body. Subsequently, begin decreasing. Decrease every other stitch in the next round, reducing the stitch count to twenty-four. Repeat this decrease pattern in the following round, leaving twelve stitches. Finally, fasten off, leaving a tail for sewing.
Next, we’ll tackle the frog’s legs. Make four legs, two for the front and two for the back. For each leg, chain four, then single crochet in the second chain from the hook and in each chain across. Turn your work and single crochet across the row. Fasten off, leaving a tail for sewing. These legs, once sewn onto the body, will give your frog a charmingly plump appearance. Similarly, the arms are created using the same method, but with only three chains instead of four, resulting in shorter limbs.
Now, let’s move on to the head. Using the same green yarn, create a magic ring and work six single crochet stitches. Increase in each stitch in the next round, resulting in twelve stitches. Work two rounds of single crochet without increases. Then, begin decreasing, decreasing every other stitch in the next round, leaving six stitches. Fasten off, leaving a tail for sewing. Once the head is complete, carefully sew it onto the body, ensuring a secure and aesthetically pleasing connection.
The finishing touches add personality to your creation. Sew on the safety eyes, positioning them carefully for a lifelike expression. Using the black yarn, embroider the frog’s nostrils and mouth. For the frog’s tongue, create a small oval shape using the white yarn and sew it into place beneath the mouth. Finally, stuff the body and head firmly with fiberfill, ensuring a pleasingly soft and cuddly texture. Sew the legs and arms onto the body, paying attention to their placement for a natural posture. Weave in all loose ends securely, ensuring a professional finish.
With the final stitch secured, your adorable green frog amigurumi is complete. This detailed pattern provides a clear guide to creating this charming amphibian. Remember, practice makes perfect, and don’t be afraid to experiment with different yarn colors and embellishments to personalize your creation. Enjoy the process of bringing this cute little frog to life!
Crocheting Cute Creatures: Mastering the Green Frog Doll
Crocheting Cute Creatures: Mastering the Green Frog Doll
Creating charming crocheted dolls is a rewarding craft, offering a delightful blend of creativity and skill development. This guide will walk you through the process of making a delightful green frog doll, perfect for beginners and experienced crocheters alike. We will focus on clear instructions and helpful tips to ensure a successful project. To begin, gather your materials. You will need medium-weight worsted weight yarn in green, a smaller amount of black and white yarn, a 3.5mm crochet hook, fiberfill stuffing, safety eyes (or embroidery floss for eyes), and a tapestry needle for weaving in ends.
First, we’ll create the frog’s body. Using your green yarn, begin with a magic ring. This technique creates a neat, invisible starting point. Chain 6, then slip stitch into the first chain to form a ring. Next, work six single crochet stitches into the ring. This completes the first round. Subsequently, increase the number of stitches in each round by working two single crochet stitches in each stitch from the previous round. Continue this pattern of increasing stitches until you have reached the desired size for the frog’s body. Remember to maintain a consistent tension throughout the process for a uniform appearance.
Once the body is the desired size, you’ll begin decreasing the stitches to shape the bottom of the frog. This is achieved by working two stitches together in each stitch from the previous round. Continue decreasing until you have a small opening to stuff the body. Carefully fill the body with fiberfill, ensuring it’s evenly distributed to avoid lumps. Once adequately stuffed, close the opening with a slip stitch. This completes the main body of your frog.
Now, let’s move on to the frog’s legs. These are created using the same green yarn. Begin with a chain of six stitches, then work single crochet stitches back and forth across the chain. Increase the number of stitches in each row until you reach the desired leg length. Then, decrease the stitches in a similar manner to the body, creating a tapered shape. Make four legs in total. Sew these legs securely onto the frog’s body, two on each side.
Similarly, the arms are created using the same technique as the legs, but with fewer stitches to create smaller limbs. Attach these to the body, positioning them slightly above the legs. Next, we’ll add the finishing touches. Using the black yarn, embroider the frog’s mouth. Alternatively, you can use black yarn to crochet small circles and sew them on as eyes. If you prefer, you can use safety eyes, which are readily available at craft stores. Finally, using the white yarn, embroider small highlights on the eyes to add depth and expression.
With the main body and limbs completed, and the facial features added, your adorable green frog doll is nearly finished. The final step involves weaving in all loose ends of yarn using your tapestry needle. This ensures a clean and professional finish to your creation. Once all the ends are securely woven in, admire your handcrafted green frog doll. This charming creation can be used as a toy, a decorative item, or even a unique gift. Remember, practice makes perfect, and with each project, your crocheting skills will improve. Enjoy the process of creating your own cute crocheted creatures!
Beginner-Friendly Frog: A Step-by-Step Guide to Crochet Doll Making
Cute Crochet Dolls: How to Make a Green Frog Step-by-Step
Creating charming crochet dolls is a rewarding craft, accessible even to beginners. This guide will walk you through the process of making a delightful green frog doll, perfect for showcasing your newfound skills. To begin, you will need some basic materials. Gather medium-weight green yarn, a crochet hook appropriate for your yarn weight (check the yarn label for recommendations), fiberfill stuffing, a tapestry needle for weaving in ends, and safety eyes. You may also wish to have a stitch marker on hand to help keep track of your rounds.
We’ll start by creating the frog’s body. Using a magic ring, or an alternative starting method if you prefer, begin with six single crochet stitches. This forms the foundation of your frog. In the next round, increase each stitch by working two single crochets into each stitch from the previous round, resulting in twelve stitches. Continue increasing in this manner, adding six stitches per round, until you reach a desired body size. Remember to maintain a consistent tension throughout to ensure a smooth, even surface. Once the body is the desired size, work several rounds without increases to create a defined shape.
Next, we’ll move on to shaping the frog’s head. Instead of increasing, you’ll now begin decreasing. This is achieved by working two stitches together in a single crochet. Decrease gradually, working two stitches together in alternating stitches across the round. Continue decreasing until the head tapers to a point, creating a smooth transition from body to head. Once the head is complete, carefully fasten off the yarn, leaving a tail for sewing.
Now, it’s time to add the frog’s charming features. Using the tapestry needle, carefully sew on the safety eyes, positioning them symmetrically on the head. For the mouth, you can embroider a simple smile using a contrasting color yarn. Alternatively, you can crochet a small, separate piece for the mouth and sew it onto the face. This allows for more creative expression and customization.
With the head and body complete, we can now assemble the frog. Before stuffing, ensure all yarn ends are securely fastened to prevent them from unraveling. Gently stuff the body and head with fiberfill, ensuring even distribution to create a plump and appealing frog. Once adequately stuffed, carefully sew the head to the body, using a strong stitch to ensure a secure connection.
Finally, we’ll add the finishing touches. You can crochet small legs and arms, attaching them to the body using the same sewing technique. Consider adding details like small crocheted lily pads or a tiny fly for extra charm. Remember to weave in all loose ends neatly to maintain a professional finish. With a little patience and attention to detail, you’ll have a delightful, handmade green frog doll ready to be admired. This process, while detailed, is surprisingly straightforward, making it an ideal project for beginners eager to explore the world of crochet doll making. The satisfaction of creating something beautiful and unique with your own hands is truly rewarding.

